

DataFlow-WebUI
Overview
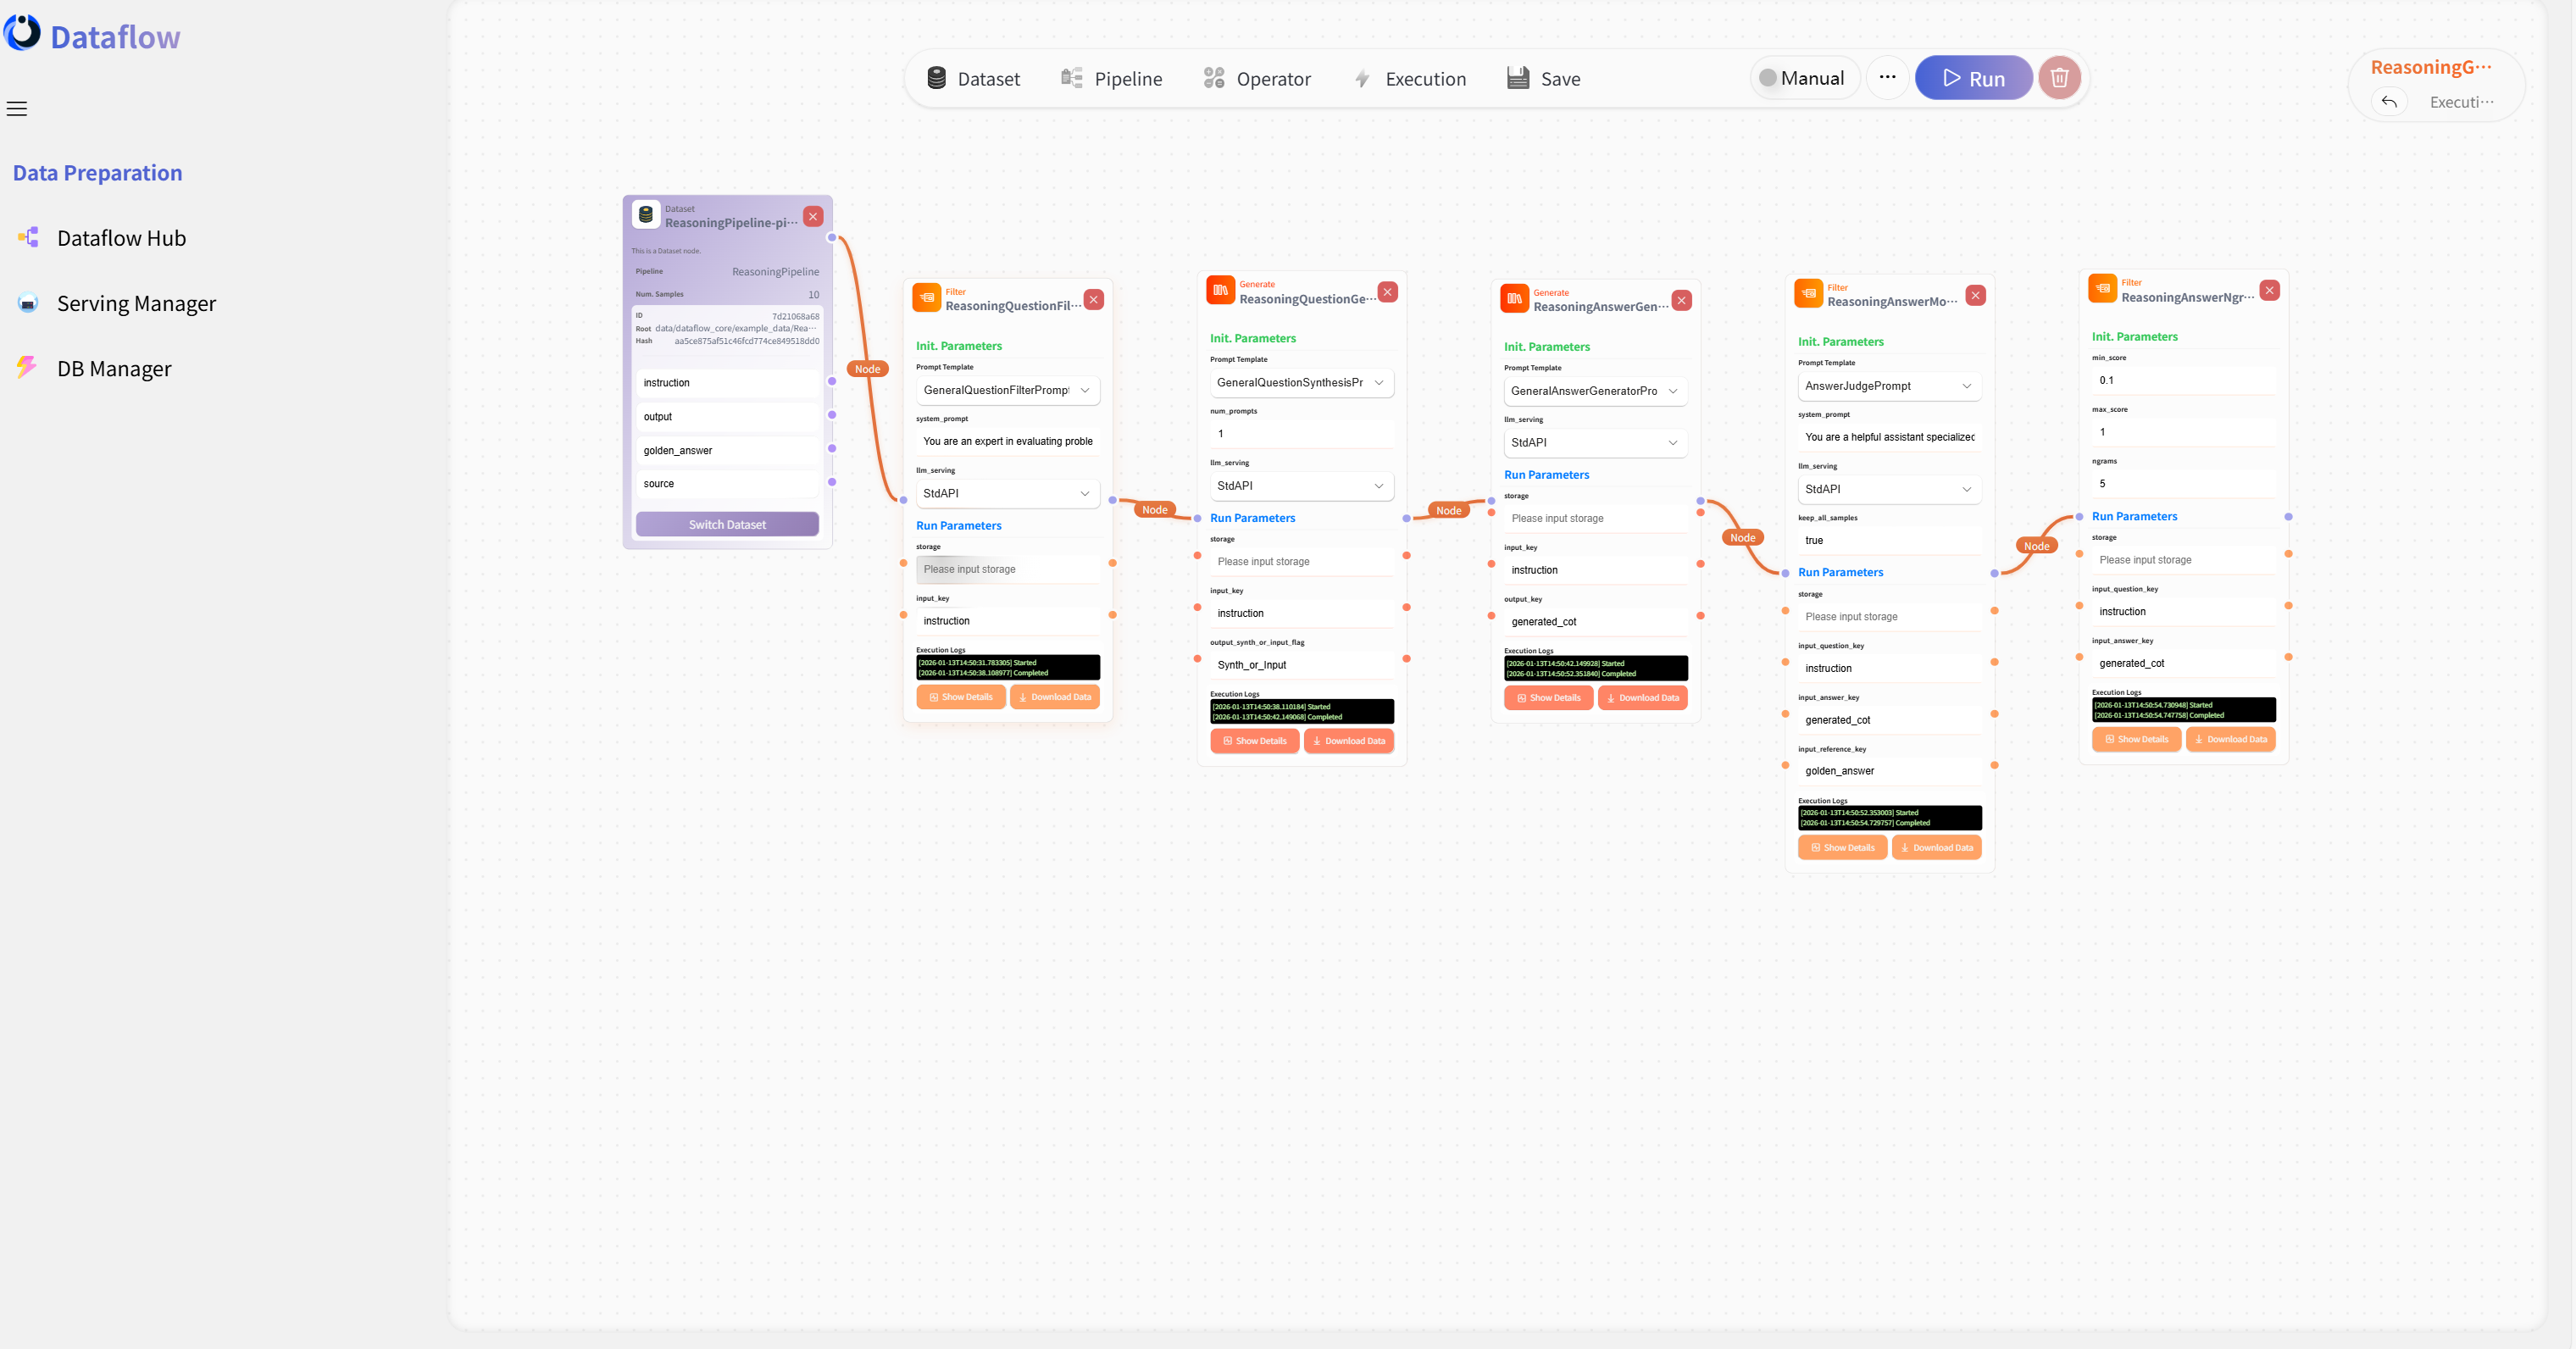
To make it easier for users who are not familiar with coding to intuitively experience the design of DataFlow operators and pipelines, we have carefully developed a fully functional DataFlow WebUI with both frontend and backend support. The technology stack uses Vue + FastAPI for the frontend and backend respectively.
The backend wraps the operators and Pipelines from the DataFlow Python library and executes tasks via Ray. In addition, DataFlow-WebUI is provided as an open-source project, serving as a reference for building workflow orchestration frameworks.
Features
- Built specifically for DataFlow, with built-in DataFlow pipeline capabilities and sample datasets. You can start experiencing it immediately after installation.
- Supports intuitive pipeline orchestration on a canvas through drag-and-drop operations. Users can compose operators into pipelines, run them, monitor execution status in real time, and download the resulting data.
- Currently, only API-deployed large model backends are supported. If you want to use local models, you can first deploy them as services via vLLM or SGLang, and then configure API access.
- As a research-oriented open-source project, the WebUI focuses on simplicity and maintainability. Therefore, business-oriented features such as user management and multi-concurrency queues are not included. It is mainly intended for local deployment and experimentation.
Usage
First, follow the installation guide to install the main DataFlow repository. After installation, you can start the DataFlow WebUI by running the following command:
dataflow webuiYou can also manually modify the port, URL, or use downloaded ZIP file or exist file path to run WebUI. For detailed options, use the -h flag:
dataflow webui -hThe system will then automatically download the latest release of DataFlow-WebUI from GitHub Releases, extract it locally, and start the service. Once deployment is complete, your browser should open automatically. If it does not, you can manually visit:
http://localhost:<port>/to access the WebUI.
We provide tutorial documentation on how to use the WebUI. Please refer to:
- Chinese Tutorial: https://wcny4qa9krto.feishu.cn/wiki/F4PDw76uDiOG42k76gGc6FaBnod
- English Documentation: https://wcny4qa9krto.feishu.cn/wiki/SYELwZhh9ixcNwkNRnhcLGmWnEg
Note: If you are interested in the specific frontend and backend implementation, or in the GitHub Actions configuration for automated releases, and would like to explore the source code, please refer to: https://github.com/OpenDCAI/DataFlow-webui
Extending WebUI Operator Library with DataFlow-Ecosystem
The DataFlow-Extension operator library implemented in the previous section can be introduced into the WebUI for use through registration.
First, locate the backend/app/core/config.py file in the downloaded and extracted DataFlow-WebUI directory. In the _DATAFLOW_EXTENSIONS section, add the string of Python package name of your DataFlow-Extension, and ensure that the package is installed in your current Python environment. For example, if your custom package name is df_sunnyhaze, it should be modified as follows:
    # Please input your custom DataFlow extensions here, the system will try to dynamically load them at runtime
    _DATAFLOW_EXTENSIONS = [
        "df_sunnyhaze"
    ]
You can import multiple dependency packages. After adding them, restart the WebUI service, and you should see the operators from DataFlow-Extension in the WebUI operator library.
Building Pipelines with an AI Agent
Beyond drag-and-drop orchestration on the canvas, DataFlow-WebUI now ships with a built-in agent that lets you build pipelines through natural language. You describe a target in plain English (or Chinese), and the agent queries the DataFlow operator library over MCP, plans the operator chain, and renders a runnable pipeline directly onto the canvas.
The agent layer supports multiple code-agent backends — Claude Code, Codex, and Cursor — in two distinct usage modes.
Note: The agent feature relies on the setup scripts and MCP/skill configuration that live in the source repository (
.mcp.json,.claude/skills/,.cursor/,scripts/). These are not part of the release zip downloaded bydataflow webui. To use the agent, clone the source repo and run the one-command setup described below, rather than the release flow above.
Two usage modes
Mode A — WebUI Dispatch (chat from the browser). The WebUI backend spawns a code-agent CLI headlessly when you chat in the browser chat panel. A small agent dropdown in the chat header lets you pick the backend per session. Agents in this mode: Claude Code and Codex.
Mode B — IDE / Terminal (user-driven). The agent runs in your own IDE or terminal and connects to the WebUI's MCP server at http://localhost:8000/mcp, pushing the pipeline it builds back onto the WebUI canvas. Agents in this mode: Cursor IDE and Claude Code (terminal).
Why Cursor is not in the dropdown. Cursor is not dispatched by the WebUI backend. Its intended use is to open this project in Cursor IDE, where your existing Cursor session discovers the
dataflowMCP server (.cursor/mcp.json) and renders pipelines back into the WebUI canvas. There is no need to select an agent in the WebUI when you work from Cursor.
| Agent | Mode | How to use | MCP config location | Auth |
|---|---|---|---|---|
| Claude Code | WebUI dispatch | Pick "Claude Code" in the chat dropdown | --mcp-config .mcp.json (passed by backend) | ANTHROPIC_API_KEY (or ANTHROPIC_BASE_URL for a gateway/中转) |
| Codex | WebUI dispatch | Pick "Codex" in the chat dropdown | ~/.codex/config.toml [mcp_servers.dataflow] | OPENAI_API_KEY (+ optional OPENAI_BASE_URL), or codex login OAuth (ChatGPT Plus/Pro, no API key needed) |
| Cursor IDE | IDE / terminal | Open this project in Cursor; the Agent panel auto-discovers MCP | .cursor/mcp.json (project-scoped) | Cursor built-in auth |
| Claude Code (terminal) | IDE / terminal | Run claude in this repo; it reads .mcp.json automatically | .mcp.json at repo root | ANTHROPIC_API_KEY |
Prerequisites
- Python 3.10+ with pip
- Node.js 20+ with npm
- Git
- At least one code-agent CLI:
- Claude Code:
curl -fsSL https://claude.ai/code/install.sh | sh - Codex:
npm i -g @openai/codex - Cursor: Download Cursor IDE
- Claude Code:
One-command setup
Clone the source repository and run the installer:
git clone https://github.com/OpenDCAI/DataFlow-WebUI.git
cd DataFlow-WebUI
./scripts/setup_all.sh
./scripts/start.sh
setup_all.sh is idempotent (safe to re-run). It checks prerequisites, installs DataFlow + backend dependencies, builds the frontend, initializes the DataFlow data directory, and configures MCP for all agents (delegating to ./scripts/setup_agent.sh all). To (re)configure just one agent:
./scripts/setup_agent.sh claude # or: cursor / codex / allThis writes the per-agent config files:
| Agent | Files written |
|---|---|
| Claude Code | .mcp.json (repo root) |
| Cursor IDE | .cursor/mcp.json + .cursor/rules/*.mdc |
| Codex | ~/.codex/config.toml (appends [mcp_servers.dataflow]) + AGENTS.md |
Authentication
Export the credentials for whichever agent you use, in the same shell that starts the backend:
# Claude Code
export ANTHROPIC_API_KEY=sk-ant-...
export ANTHROPIC_BASE_URL=https://your-gateway/v1   # only if using a gateway/中转

# Codex — option 1: API key
export OPENAI_API_KEY=sk-...
export OPENAI_BASE_URL=https://your-gateway/v1      # only if using a gateway/中转

# Codex — option 2: ChatGPT Plus/Pro OAuth (no API key)
codex login
Cursor IDE uses its own built-in authentication — no environment variable needed.
Using the agent
From the browser (Claude Code / Codex). Start the backend with ./scripts/start.sh and open http://localhost:8000/. In the chat panel header, pick Claude Code or Codex from the agent dropdown, then describe what you want to build. Switching the dropdown starts a fresh conversation (different agents do not share session ids); your last choice is remembered across reloads. The agent queries operators over MCP, plans the chain, and syncs the resulting pipeline onto the canvas. It will not auto-execute a pipeline unless you explicitly ask.
From Cursor IDE. Open this project in Cursor. .cursor/mcp.json defines the dataflow MCP server, but Cursor requires you to enable it once:
- Open Cursor Settings (Cmd/Ctrl + Shift + J → Settings)
- Go to Features → MCP Servers (or search "MCP")
- Find
dataflowand toggle it ON - If it shows "failed", make sure the backend is running:
./scripts/start.sh --status - Click "Refresh" or restart Cursor to reconnect
Then chat in Cursor's Agent panel as usual — the pipeline syncs back to the WebUI canvas via MCP. No agent selection in the WebUI is needed.
From the Claude Code terminal. Run claude inside the cloned repo; it reads .mcp.json automatically and connects to the running backend.
Verify the agent connection
| Agent | Verify command |
|---|---|
| Claude Code | claude --print --mcp-config .mcp.json --output-format text "call mcp__dataflow__list_operator_categories and report the result" |
| Codex | codex exec --json --sandbox workspace-write "call the dataflow MCP tool list_operator_categories and report the result" |
| Cursor IDE | In the Agent panel: "call the dataflow MCP tool list_operator_categories and report the result" |
A correct setup returns a list of operator categories such as core_text, general_text, reasoning, … If it fails, the backend may not be running (./scripts/start.sh), MCP may not be activated (see the Cursor steps above), or authentication may be missing.
Troubleshooting
| Symptom | Most likely cause | Fix |
|---|---|---|
<cli>: command not found in backend logs | The CLI binary is not on the PATH the backend sees | Re-install it, or set DATAFLOW_CLAUDE_CLI / DATAFLOW_CODEX_CLI=/abs/path/to/cli before launching the backend |
Chat replies are empty or return an immediate done | The agent failed to authenticate | Confirm the relevant API key is exported in the shell that started the backend; for Codex without an API key, run codex login first |
| Tool calls fail with "MCP server not reachable" | The agent's MCP config doesn't point at this backend | Re-run ./scripts/setup_agent.sh <kind> and confirm the backend is on localhost:8000 |
| The agent invents non-existent operators | The construction skill is not loaded | For Cursor, re-run ./scripts/setup_agent.sh cursor to regenerate .cursor/rules/; for Codex, regenerate AGENTS.md |
Cursor IDE shows no dataflow MCP tools | .cursor/mcp.json is missing, or the backend is not running | Run ./scripts/setup_agent.sh cursor and make sure the backend is up at localhost:8000 |
For the full agent setup reference, including authorization scope and behavioral rules, see
AGENT_SETUP.mdin the DataFlow-WebUI repository.